Storm resources
What to photograph after a hail storm
Photos taken in the first hours after a storm are the best evidence you will ever have. Hail melts, granules wash away, and a week later nobody remembers which dent came first. Here is what to capture, in order.
Safety first
Wait until the storm has fully passed. Do not climb onto the roof: a hail-battered roof is slick, and a fall costs far more than any claim is worth. Everything below can be photographed from the ground, a window or the driveway. Stay clear of downed lines and sagging gutters.
1. The hail itself, right away
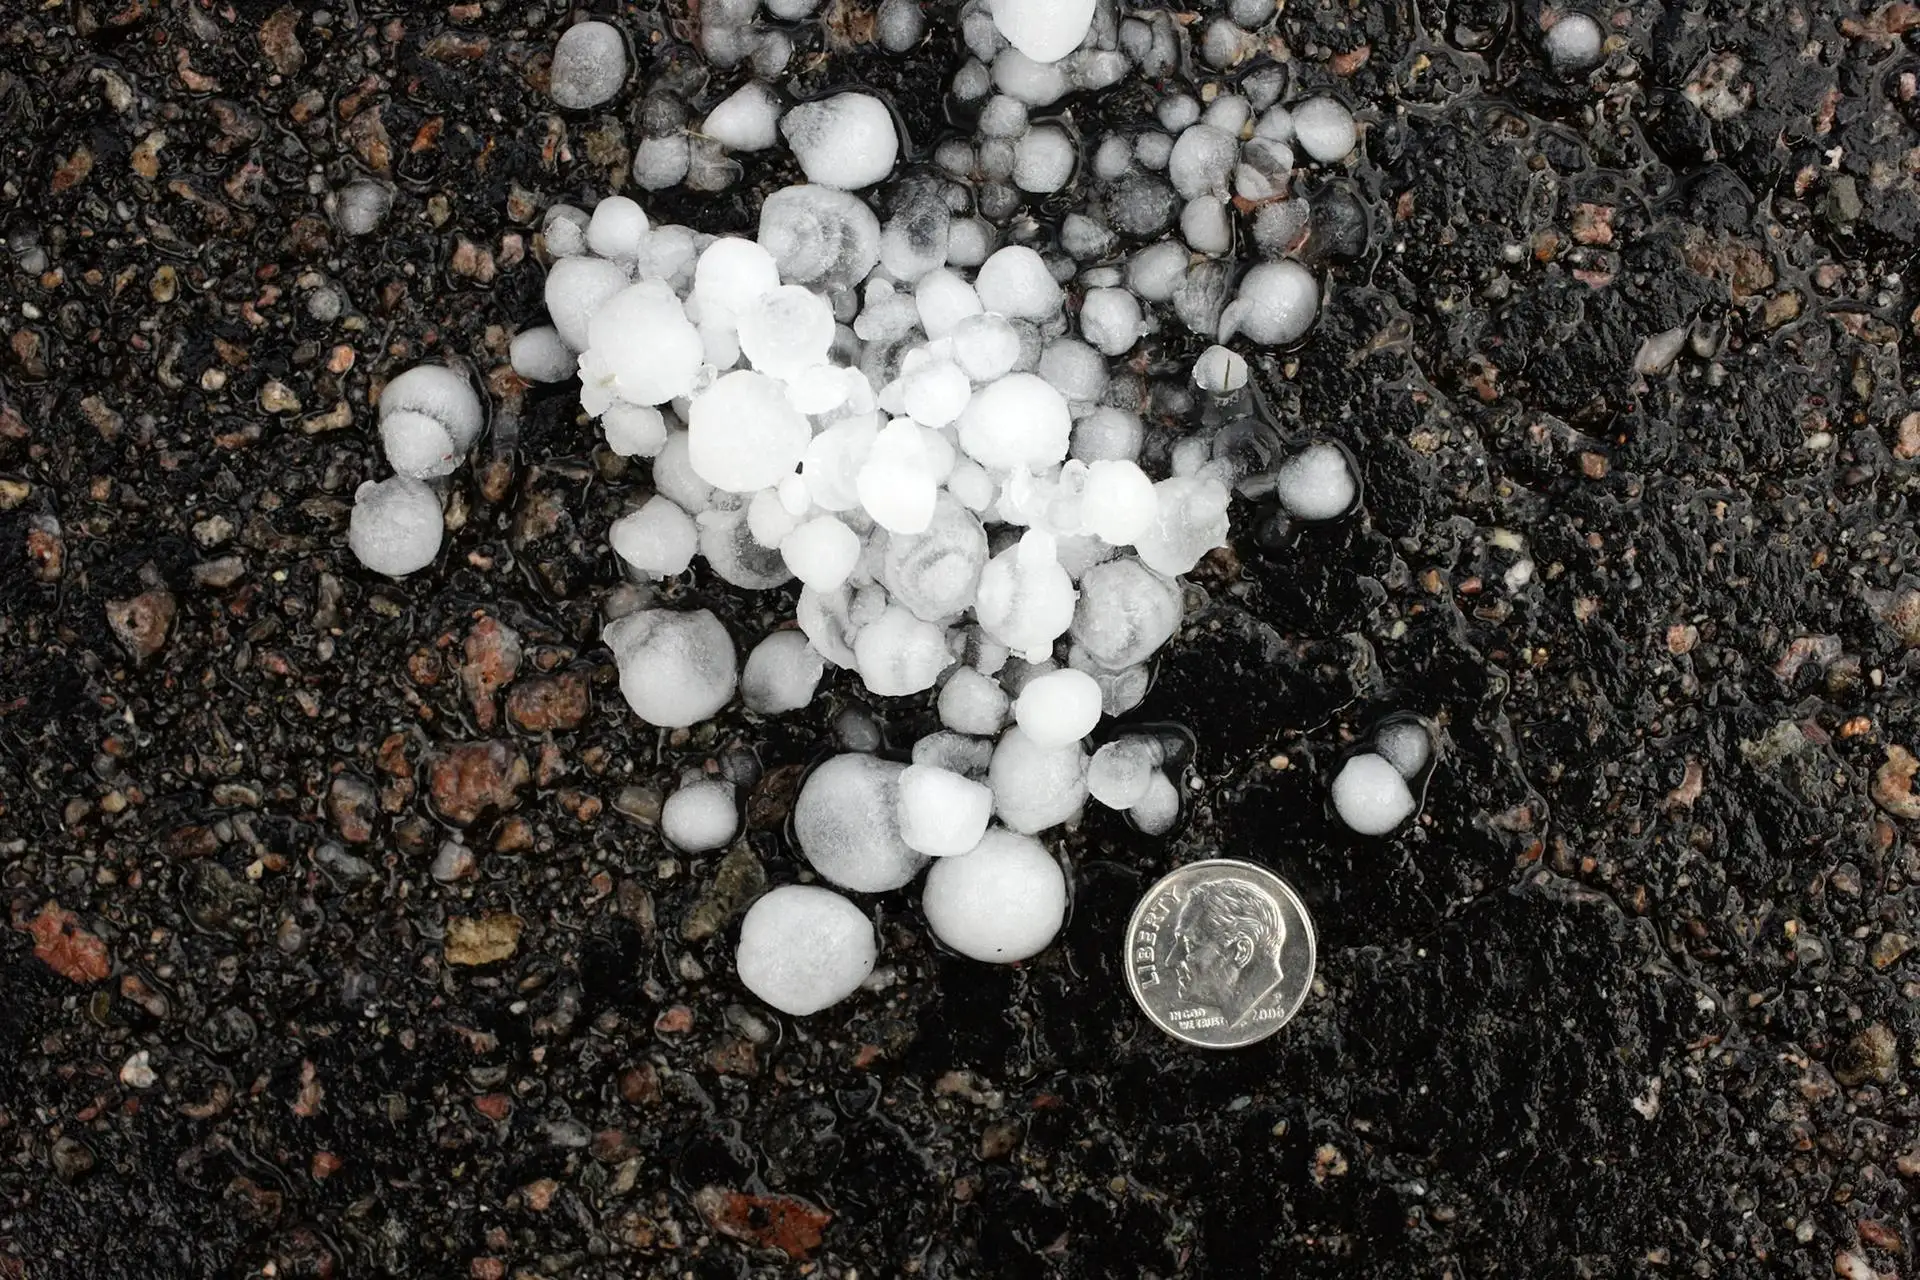
Hailstones melt in minutes. Put a coin, a ruler or a tape measure next to a few of the largest stones and photograph them before they go. Your phone records the date and time in the photo file, which ties the pictures to the storm.
2. Soft metals around the house
Dents in thin metal show how big the hail was and which way it came from. Photograph:
- Gutters and downspouts, especially the side facing the storm
- Roof vents, turbines and the flashing you can see from the ground
- The fins on the air conditioner condenser
- The mailbox, metal patio covers, light fixtures and fence caps
3. Every side of the roof, from the ground
Walk around the house and take one wide photo of each slope, then zoom in on anything that looks different: missing or creased shingles, dark spots where the granules were knocked off, lifted edges. Look at the splash blocks under the downspouts too. A pile of loose granules there after a storm is worth a photo.
4. Siding, windows and everything else outside
- Torn window screens and cracked glass
- Chips and splatter marks on siding, trim and painted surfaces
- Damage to fences, sheds and outdoor furniture
- Your cars, if they were parked outside
5. Inside the house
Check ceilings for new stains, especially under valleys and around chimneys, skylights and vent pipes. If you can safely get into the attic, look for wet insulation or daylight. Photograph what you find, and keep checking for a few days: slow leaks can take time to show.
6. Temporary repairs and receipts
Your policy usually expects you to prevent further damage, such as covering a hole so rain does not get in. Photograph the damage before anything is covered, keep every receipt for tarps and temporary repairs, and do not throw damaged items away until your adjuster says you can. Roof leaking right now? Emergency tarping is available 24/7 at (210) 555-0198 (demo number).
7. Then report it
Back up the photos somewhere other than your phone, then call your agent or insurance company to report the damage as soon as you can. Keep a note of everyone you speak with and when. The next step is covered in how a roof insurance claim actually works.
General information about how roof claims usually work in Texas, written for a demo site. It is not legal or insurance advice. Your policy and your insurer decide what is covered.